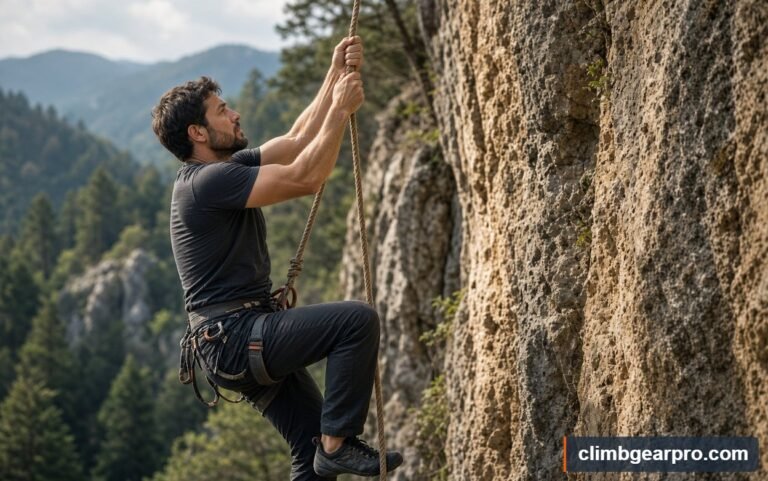
How to Inspect a Climbing Harness Before Every Climb
A climbing harness doesn’t hold you up. It holds you in — it keeps your body attached to the rope and spreads the force across your waist and legs so a fall doesn’t break you. That is why you inspect it before every climb, because the damage that matters is often invisible: cut webbing, corrosion inside a buckle, a stitch line that’s been rubbed by rock for two seasons.
So how do you inspect a climbing harness before every climb? You check five things in about 60 seconds — webbing, stitching, buckles, the belay loop, and the tie-in points. If any one of them fails, you don’t climb on it.
Here’s the part most guides get wrong. They tell you to look for “wear and tear” and stop there. But a harness rarely fails from visible wear. It fails from a small, specific thing: a nick in the belay loop, a doubled-back buckle that isn’t doubled back, or UV damage that makes nylon feel stiff and chalky. You’re not looking for “old.” You’re looking for those exact faults.
Key Takeaways
- What a Climbing Harness Is and How It Works: A climbing harness is a stitched assembly of nylon or polyester webbing, foam padding, and metal buckles.
- Types of Climbing Harnesses and How to Choose: There are four main types, and the right one depends on what you’re climbing, not on price.
- How to Inspect a Climbing Harness at the Trailhead: Before you rack up, do this. It takes under a minute and it catches the faults that actually cause failures.
- Belay Loop vs. Tie-In Points: What People Confuse: These two get mixed up all the time, and the confusion leads people to clip the wrong thing.
- What a Harness Inspection Can’t Tell You: An inspection catches damage you can see and feel. It can’t tell you the history of the harness.
- When to Retire a Harness and When to Get a Pro: Retire a climbing harness the moment you find any of these: a cut or nick in the belay loop or tie-in points, visible core (the inner strands) on any load-bearing webbing, frayed or loose…
Recommended Products for Climbing Harnesses
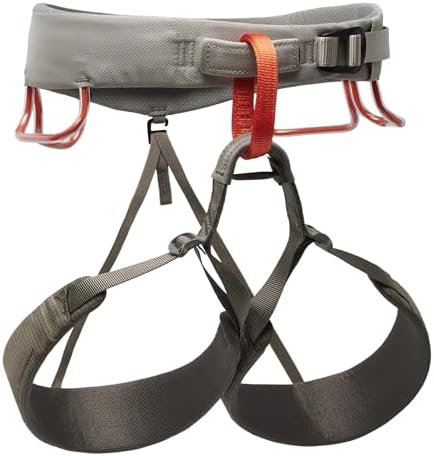
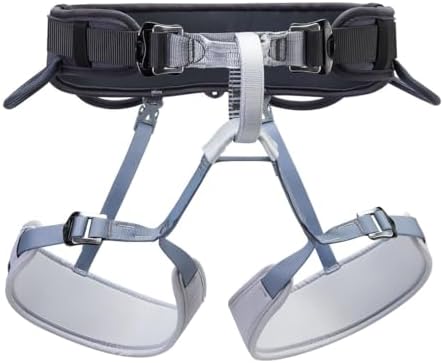
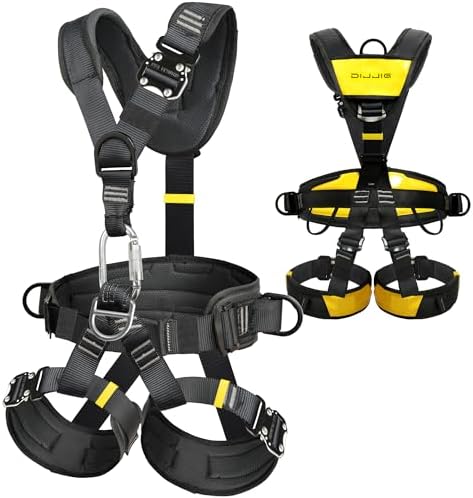


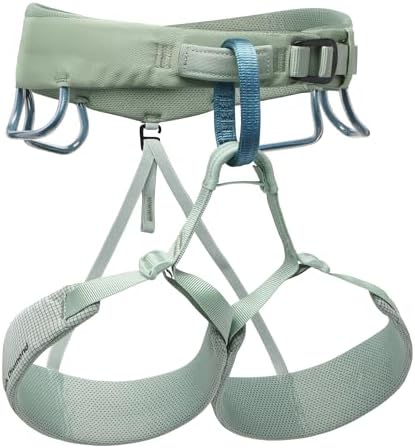


What a Climbing Harness Is and How It Works
A climbing harness is a stitched assembly of nylon or polyester webbing, foam padding, and metal buckles. The webbing carries the load. The padding only spreads pressure so it doesn’t hurt. That distinction matters, because padding can look perfect while the webbing underneath is compromised.
Two terms you’ll hear constantly: the belay loop and the tie-in points. The belay loop is the strong, short loop at the front center. Your belay device clips here. The tie-in points are the two loops at the waist and legs where your rope knot goes. On most modern harnesses, the belay loop is the single strongest part of the whole system.
Manufacturers build harnesses to a shared safety standard. In Europe, that’s EN 12277, and the current version is EN 12277:2015+A1:2018. The UIAA also endorses the EN 12277 harness standard. A harness sold for climbing should carry that CE mark and the EN number on its label. If it doesn’t, it isn’t climbing gear.
One counterintuitive fact: the metal parts usually outlast the soft parts. Buckles and D-rings are aluminum or steel and rarely fail. The webbing — the part that actually holds you — is what ages, and it ages from sunlight, abrasion, and chemicals, not from big falls.
Types of Climbing Harnesses and How to Choose
There are four main types, and the right one depends on what you’re climbing, not on price. A cheap harness that fits well beats an expensive one that doesn’t.
- Sport climbing harness: padded waist and legs, gear loops, comfortable for hanging. Best if you’ll fall and hang a lot.
- Trad climbing harness: more padding and more gear loops, because you carry more gear. Heavier, but you’ll want the rack space.
- Alpine and mountaineering harness: minimal padding, sometimes no leg loops (just a waist belt and a tie-in), because you wear it over layers and walk in it. Less comfortable for hanging.
- Kids’ and gym harnesses: full-body or simple designs, often with a fixed fit. Fine for top-rope and gym use.
The trade-off is always weight versus comfort. A light alpine harness saves grams but hurts after 20 minutes of hanging. A padded sport harness is bliss at the crag but bulky on a long approach.
Here’s where a cheaper option is genuinely fine: for gym climbing and top-rope, a basic harness costs far less than a premium one and does the same job. You’re not hanging for long, you’re not carrying a rack, and the safety standard is identical. Save the money for shoes.
If you climb outside on lead, spend more. You’ll hang on the rope while clipping, and a harness that digs into your thighs makes you rush — and rushing is how mistakes happen.
How to Inspect a Climbing Harness at the Trailhead
Before you rack up, do this. It takes under a minute and it catches the faults that actually cause failures. Do it every single time, even on a harness you used yesterday.
- Hold the harness up to light and run your thumb along the belay loop. Feel for nicks, fuzz, or a flat, shiny spot. Any cut or core showing means stop.
- Squeeze the waist webbing between your fingers. It should feel supple. If it’s stiff, chalky, or crumbly, that’s UV or chemical damage — retire it.
- Look at every stitch line. Stitching should be tight and even. Loose, frayed, or pulled threads at the tie-in points or belay loop are a fail.
- Check the buckles. They must slide freely and lock. Any corrosion, bent metal, or a buckle that won’t stay closed is a fail.
- Put it on and check the fit. You should fit two fingers flat under the waist belt, and the leg loops shouldn’t pinch. Then confirm both buckles are doubled back if they’re the thread-through type.
If all five pass, you’re good to climb. If any one fails, don’t climb on it — borrow a harness or go home. A harness isn’t something to “be careful with” on a bad day.
Belay Loop vs. Tie-In Points: What People Confuse
These two get mixed up all the time, and the confusion leads people to clip the wrong thing. The belay loop is for your belay device and your personal anchor. The tie-in points are for your rope knot — and only your rope knot.
| Feature | Belay Loop | Tie-In Points |
|---|---|---|
| What it’s for | Belay device, personal anchor | Your climbing rope knot |
| Strength | Strongest single point on the harness | Strong, but two points share the load |
| Can you clip a carabiner to it? | Yes, that’s its job | No — never clip gear here |
| Wear pattern | Abrasion from belay device | Abrasion from the rope knot |
| Inspect for | Cuts, fuzz, thinning | Fraying, cuts, stitch damage |
| Replace if damaged | Retire the whole harness | Retire the whole harness |
The rule is simple: rope goes through the tie-in points, hardware goes on the belay loop. Clipping a carabiner through both tie-in points at once is an accepted technique for belaying and rappelling, though it should be done correctly.
If you’re not sure which is which on your harness, the belay loop is the short, thick, permanently stitched loop at the very front. The tie-in points are the two loops above and below it, where the waist belt and leg loop meet.
What a Harness Inspection Can’t Tell You
An inspection catches damage you can see and feel. It can’t tell you the history of the harness. A harness that looks perfect might have taken a huge fall, sat in a hot car for three summers, or been soaked in battery acid. None of that shows up reliably in a visual check.
Marketing overreaches here too. Some brands imply their harness “lasts forever” or is “indestructible.” No harness is. Nylon degrades from UV light, and no coating stops that. The evidence on exactly how fast it degrades in real use is thin — most lifespan advice comes from manufacturers, not from independent long-term studies.
There’s one limit worth naming: how long a harness lasts depends on how much sun, sweat, and abrasion it sees, and only you know that number. A gym harness used twice a week indoors can last many years. A harness worn on sunny alpine rock every weekend may need replacing far sooner. Read your own use honestly, and check the manufacturer’s stated lifespan for your model.
Also, an inspection can’t test strength. You can’t pull on a harness hard enough to prove it’s strong — that would damage it. The check is about finding faults, not proving safety.
When to Retire a Harness and When to Get a Pro
Retire a climbing harness the moment you find any of these: a cut or nick in the belay loop or tie-in points, visible core (the inner strands) on any load-bearing webbing, frayed or loose stitching, corrosion or a bent buckle, or webbing that feels stiff and chalky. Any one of these means the harness is done.
Manufacturers give lifespan guidance, and it varies. Most say to retire a harness after a certain number of years of use, or sooner with heavy use, UV exposure, or any major fall. Check your specific model’s manual — the number is on the maker’s website, not on a blog. Some also say to retire after a single severe fall, even if it looks fine.
Here’s where it stops being a do-it-yourself job. If you’re unsure whether damage is cosmetic or structural, don’t guess — ask a certified climbing instructor or a guide, or contact the manufacturer directly. And if you’re learning to lead climb, build anchors, or belay with a new device, get instruction from a certified guide, not from a video. The harness is simple. The systems around it are not.
How to Use and Care for a Climbing Harness
Good care is mostly about avoiding three things: sunlight, chemicals, and heat. Store your harness in a cool, dry place, out of direct sun. Don’t leave it in a hot car — heat and UV together age nylon faster than either alone.
Clean it gently when it gets dirty. Use lukewarm water and a mild soap, rinse well, and hang it to dry in the shade. Never use bleach, solvents, or a washing machine. Never dry it near a fire or a heater.
After every session, do a quick look-over before you pack it away. Catching a small nick at the car is much better than catching it at the base of a route. Keep a mental note of how much sun and abrasion the harness is getting — that’s your real retirement clock.
Store it hanging, not crushed under other gear, so the webbing doesn’t take a permanent crease. And keep a log, even a note on your phone, of when you bought it and any big falls. That record is what tells you when to replace it.
Related guides
- How to Wash a Climbing Rope Safely to Extend Its Lifespan
- Dynamic vs Static Rope: How to Choose the Right Climbing Line
FAQ
How often should I inspect my climbing harness?
Before every climb, and a deeper check once a month. The quick trailhead check takes under a minute. The monthly check includes the leg loop elastic, gear loops, and a close look at all stitching.
Can a climbing harness fail without visible damage?
Yes. UV degradation and chemical exposure can weaken nylon without obvious marks, though stiff, chalky webbing is a warning sign. This is why age and use history matter as much as what you can see.
How long does a climbing harness last?
Most manufacturers say up to 5 years of use, or 10 years from the date of manufacture, depending on use. Heavy sun, sweat, and abrasion shorten that. Check your model’s manual for the exact guidance.
Is it safe to buy a used climbing harness?
Only if you know its full history and it passes every check. Since you usually can’t verify the history, most climbers avoid used harnesses. The savings aren’t worth the risk.
What’s the difference between the belay loop and tie-in points?
The belay loop holds your belay device and hardware. The tie-in points hold your rope knot. Never clip gear to the tie-in points, and never clip a carabiner through both at once.
Can I wash my climbing harness?
Yes, with lukewarm water and mild soap, then air-dry in the shade. Never use bleach, solvents, or a machine, and never dry it near heat.
Does a big fall damage a harness?
It can. Some makers say to retire a harness after one severe fall, even if it looks fine. Check your manufacturer’s guidance and when in doubt, replace it.
What should I do if I find a cut in my harness?
Stop using it. A cut in the belay loop or tie-in points means retire the whole harness. Don’t tape it, sew it, or “keep an eye on it.”
Can I climb in a harness with a broken gear loop?
Yes, a broken gear loop isn’t a safety issue — it just means you’ll drop gear. But check the rest of the harness carefully, since the same impact may have damaged something that does matter.
Do I need a professional to inspect my harness?
For normal checks, no — you can do them yourself. But if you’re unsure whether damage is structural, ask a certified instructor, a guide, or the manufacturer.
The Bottom Line
The key decision is simple: if all five checks pass — webbing, stitching, buckles, belay loop, tie-in points — climb. If any one fails, retire the harness. Don’t negotiate with it, don’t tape it, and don’t save it for “easy days.” A harness is either good or it’s gone.
The single most important takeaway: inspect before every climb, and treat age and use history as seriously as visible damage. The faults that hurt people are usually small and easy to miss. Sixty seconds at the trailhead is the cheapest safety gear you’ll ever own.