
Assisted Braking Belay Device: Ultimate Guide for Safe Climbing
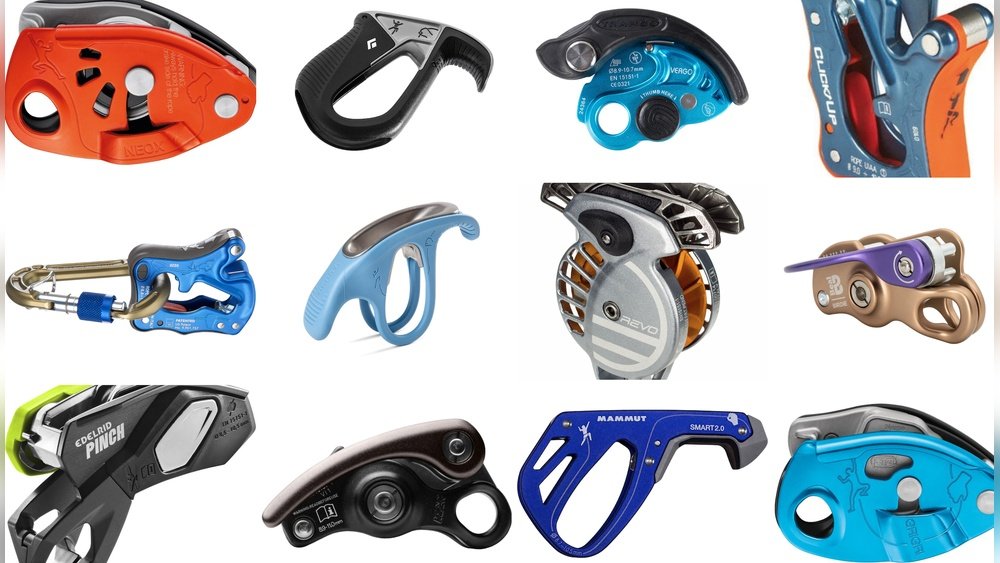
Belaying is a key skill for anyone climbing, indoors or outdoors. The belayer controls the rope and acts as the climber’s lifeline. Over the last two decades, a special kind of belay tool—the assisted braking belay device—has become the standard for safety and ease.
These devices help the belayer stop a fall, even if the belayer is tired, distracted, or surprised. But how do they work, why are they so popular, and how do you choose the right one? This guide will answer these questions and more, providing clear explanations, useful comparisons, and practical tips for both beginners and experienced climbers.
Key Takeaways
- What Is An Assisted Braking Belay Device?
- How Assisted Braking Devices Work
- Why Climbers Choose Assisted Braking Devices
- Main Types Of Assisted Braking Devices
- Key Features To Compare
- Practical Benefits And Limitations
On this page
- What Is An Assisted Braking Belay Device?
- How Assisted Braking Devices Work
- Why Climbers Choose Assisted Braking Devices
- Main Types Of Assisted Braking Devices
- Key Features To Compare
- Practical Benefits And Limitations
- Step-by-step: How To Use An Assisted Braking Belay Device
- Assisted Braking Devices In The Gym And Outdoors
- Comparing Assisted Braking Devices: A Closer Look
- How To Choose The Right Assisted Braking Device
- Maintenance And Care Tips
- Recent Innovations And Future Trends
- Environmental And Ethical Considerations
- Real-world Examples And Case Studies
- Training And Certification
- Frequently Asked Questions
What Is An Assisted Braking Belay Device?
An assisted braking belay device is a tool used in climbing to help control a rope during belaying. Unlike simple “tube” style devices, assisted braking devices have a built-in mechanism that pinches or grabs the rope if there is a sudden pull, such as during a fall. This extra stopping power can reduce the force needed by the belayer, lowering the risk of dropping the climber.
Assisted braking devices are sometimes called “auto-locking” or “semi-automatic” belay devices, but those terms can be confusing. They do not lock the rope completely by themselves; the belayer still needs to keep a firm grip. Instead, they “assist” by making it much easier to hold a fall.
There are two main types:
- Mechanical (active) assisted braking: These use moving parts, like a cam or lever, to pinch the rope.
- Friction (passive) assisted braking: These have special shapes or grooves that increase friction and help stop the rope.
Related guides
Explore related guides: Tubular Belay Device: Essential Guide for Safe Climbing · ATC Style Belay Device: Ultimate Guide for Safe Climbing · Guide Mode Belay Device: Ultimate Climber’s Safety Tool Explained.



How Assisted Braking Devices Work
The main principle behind assisted braking devices is to increase friction on the rope when there is a sudden load. Here’s how they do that:
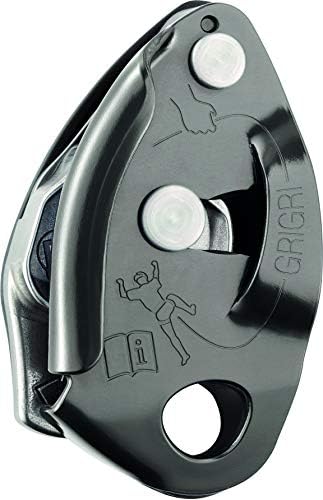
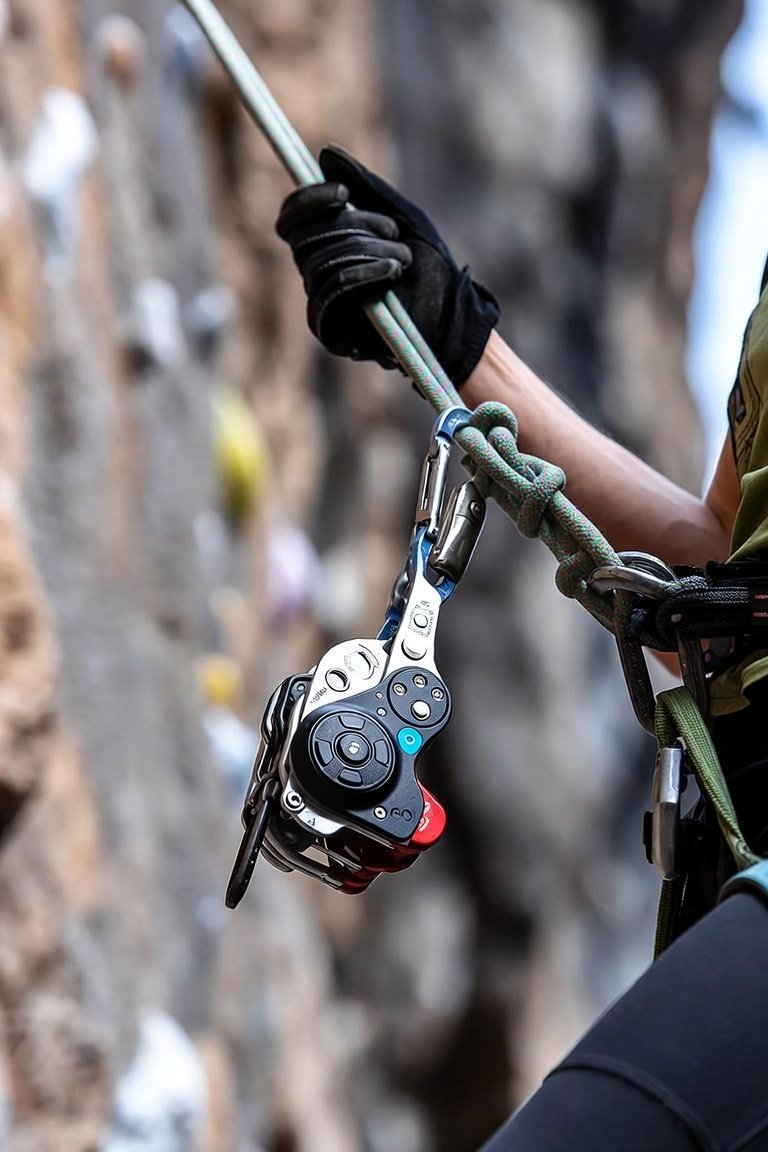
- Mechanical devices (like the Petzl GriGri) use a rotating cam. When the rope is pulled quickly (as in a fall), the cam rotates and pinches the rope, stopping it.
- Friction-based devices (like the Mammut Smart) use a clever shape. When the rope pulls hard, it jams into a corner or groove, increasing friction and making it much harder to move.
In both cases, the belayer must still hold the brake side of the rope. The device only assists; it does not replace careful technique.
Why Climbers Choose Assisted Braking Devices
Assisted braking belay devices have become popular for several reasons:
- Increased safety: They reduce the chance of dropping a climber, especially for new belayers or when belaying heavier partners.
- Less hand fatigue: The device helps hold the rope, so the belayer’s hand gets less tired during long sessions.
- Easier to catch falls: Reacting to a falling climber is easier, as the device does much of the work.
- Popular in climbing gyms: Many gyms now require or strongly recommend assisted braking devices due to their safety benefits.
However, these devices are not foolproof. It is still possible to misuse them. Beginners should always receive proper training and never rely only on the device to save them.
Main Types Of Assisted Braking Devices
Not all assisted braking devices are the same. Each type has strengths and weaknesses. Here is a closer look:
Mechanical (active) Assisted Braking
These devices use moving parts to pinch the rope. The most famous is the Petzl GriGri.
- How they work: The rope runs through the device and around a cam. If the rope is loaded quickly, the cam rotates and pinches the rope against a plate.
- Pros: Very effective at stopping falls; easy to use for top-rope and lead belaying.
- Cons: Heavier, more expensive, can be tricky for beginners to feed slack quickly.
Examples: Petzl GriGri series, Trango Vergo, Edelrid Eddy.
Friction (passive) Assisted Braking
These devices do not have moving parts. Instead, their shape increases friction during a fall.
- How they work: The belayer threads the rope through the device in a certain way. If the rope is pulled suddenly, it jams and stops.
- Pros: Lighter, cheaper, less mechanical failure risk.
- Cons: May require more practice to use smoothly; not as strong a braking force as mechanical devices.
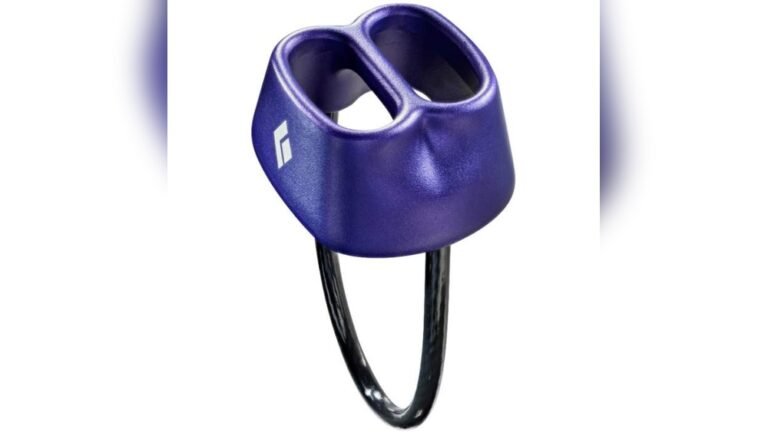
Examples: Mammut Smart, Black Diamond ATC Pilot, Climbing Technology Click Up.
Double Rope And Multipurpose Devices
Some assisted braking devices work with two ropes at once (useful for trad or alpine climbing), or can be used as a standard tube device as well.
- Examples: Edelrid Mega Jul, Mammut Smart Alpine.
These are more versatile but may require extra practice to use safely.
Key Features To Compare
When choosing an assisted braking belay device, you should consider several important factors. The following table compares three popular devices across key features:
| Device | Weight (g) | Rope Range (mm) | Type | Price (USD) | Lead Belay | Top Rope | Abseil/Rappel |
|---|---|---|---|---|---|---|---|
| Petzl GriGri+ | 200 | 8.5–11 | Mechanical | $120 | Excellent | Excellent | Yes |
| Mammut Smart 2.0 | 82 | 8.7–10.5 | Friction | $45 | Good | Good | No |
| Edelrid Mega Jul | 65 | 7.8–10.5 | Friction | $50 | Good | Good | Yes |
Insights For Beginners
- Weight matters if you carry gear far: If you plan to hike to your climbing area, a lighter device like the Mega Jul can save energy.
- Not all devices can rappel: If you need to abseil, make sure your device is designed for it. Many gym-focused models cannot.
Practical Benefits And Limitations
Safety Improvements
Assisted braking devices have been shown to reduce accidents caused by belayer error. In climbing gyms, these devices have helped lower the number of dropped climbers, especially among less experienced belayers. They also help in situations where the climber is much heavier than the belayer, as the device takes much of the stopping force.
Limitations And Risks
No device is perfect. Here are some common issues:
- False sense of security: New users may believe the device will always lock. In reality, poor technique can defeat the device’s safety.
- Incorrect rope handling: Letting go of the brake strand or holding the device open can cause dangerous slips.
- Rope compatibility: Using ropes outside the recommended diameter can make devices work poorly.
Pro tip: Always practice with your device in a controlled environment before using it outdoors or on difficult climbs.
Step-by-step: How To Use An Assisted Braking Belay Device
The exact steps depend on the device, but the general process is similar. Here is a walkthrough for a mechanical device like the GriGri:
- Open the device and insert the rope, making sure the brake side and climber side are correct (usually marked on the device).
- Close the device and lock it shut.
- Clip the device to your belay loop with a locking carabiner.
- Check everything with your climbing partner—a safety check is critical.
- Hold the brake strand at all times. Feed or take in rope as the climber moves.
- To give slack: Use the thumb to slightly open the cam while feeding rope, but never let go of the brake strand.
- To lower the climber: Slowly open the lowering lever, keeping control of the brake strand at all times.
Important: Always follow the manufacturer’s instructions for your specific device, as the steps may differ.
Common Beginner Mistakes
- Feeding or taking in rope incorrectly, leading to rope jams or sudden drops.
- Letting go of the brake strand, especially when lowering a climber.
- Using the wrong rope diameter, which can cause the device not to lock properly.
- Skipping partner safety checks.
Assisted Braking Devices In The Gym And Outdoors
In The Climbing Gym
Most indoor climbing gyms strongly recommend or require assisted braking belay devices. This is mainly because gyms see many new climbers and belayers, and these devices help prevent accidents. Gym routes are usually straight, and belaying is more controlled, making these devices especially effective.
Outdoor Climbing
Outdoors, the situation can be more complex. Assisted braking devices are still popular, but some multi-pitch or alpine climbers prefer lighter, more versatile devices. If you plan to climb outside, think about:
- Rappelling needs: Not all devices are good for abseiling.
- Double ropes: Trad and alpine climbing often use two ropes; only some assisted braking devices handle this.
- Durability: Dust, dirt, and cold can affect device performance.
Some climbers carry two devices: a lightweight tube device for backup and an assisted braking device for belaying.
Comparing Assisted Braking Devices: A Closer Look
Here is a second comparison table focusing on usability, maintenance, and rope handling:
| Device | Ease of Use | Maintenance Needs | Rope Handling Smoothness | Learning Curve |
|---|---|---|---|---|
| Petzl GriGri+ | Very Easy | Low (clean/lube cam) | Very Smooth | Low/Moderate |
| Mammut Smart 2.0 | Moderate | Very Low | Moderate | Moderate |
| Edelrid Mega Jul | Challenging for Beginners | Very Low | Can Be Jerky | High |
Non-obvious Insights
- Learning curve varies: Some assisted braking devices, especially passive types, require more practice to use smoothly. Beginners often struggle with feeding slack quickly.
- Maintenance is often overlooked: Mechanical devices need occasional cleaning and lubrication to keep the cam working well. If you climb in sandy or dirty areas, check your device often.
How To Choose The Right Assisted Braking Device
Picking the best device depends on your climbing style, experience, and preferences. Here are some tips to help you decide:
- For beginners or gym climbers: A mechanical device like the GriGri+ is very user-friendly and trusted by gyms worldwide.
- For outdoor or trad climbers: If you need to rappel or use double ropes, look for a multipurpose device like the Mega Jul or Smart Alpine.
- If you climb with partners of different weights: Choose a device with a strong assisted braking action.
- On a budget: Friction-based devices like the Mammut Smart are affordable and reliable.
- If you want the smoothest lowering: Mechanical devices usually offer better control.
Practical tip: Try a few different models at your local gym or gear shop before buying. Some devices feel better in your hand or match your rope better than others.
Maintenance And Care Tips
To keep your assisted braking device working well:
- Inspect regularly: Check for sharp edges, cracks, or worn parts.
- Clean after dusty or sandy climbs: Dirt can jam moving parts.
- Lubricate mechanical parts: Use a small amount of dry lube on cams if recommended by the manufacturer.
- Store dry: Moisture can cause corrosion, especially on steel parts.
- Replace when worn: If you see deep grooves or damage, retire the device.
Recent Innovations And Future Trends
The assisted braking device market continues to evolve. Recent trends include:
- Lighter materials: New alloys and designs reduce weight without losing strength.
- More intuitive operation: Devices like the Trango Vergo aim for simple, ergonomic designs.
- Better compatibility: New models handle a wider range of rope diameters.
- Extra safety features: For example, the GriGri+ adds an anti-panic handle, which locks the device if you pull the lowering lever too hard.
Manufacturers are also focusing on devices that are easier for beginners but still reliable for experts. As climbing grows in popularity, especially in urban gyms, expect assisted braking devices to continue improving.
Environmental And Ethical Considerations
While not obvious, the production and disposal of climbing hardware have environmental impacts. Some brands now use recycled aluminum, or offer take-back programs for old devices. Taking care of your gear extends its life and reduces waste. When your device is worn out, check if the manufacturer can recycle it.
Real-world Examples And Case Studies
- In 2018, a study in European climbing gyms found that assisted braking devices reduced belaying accidents by 50% compared to traditional tube devices.
- A survey by the American Alpine Club showed that most belayer errors leading to accidents involved letting go of the brake strand—not device failure. This highlights the importance of good technique, regardless of the device.
Training And Certification
If you are new to climbing, consider taking a belay class at your local gym. Many offer specific training on assisted braking devices. Certification programs like the Climbing Wall Instructor (CWI) often include testing on these devices. Practicing under supervision is the fastest way to build confidence and avoid dangerous mistakes.
Frequently Asked Questions
What Is The Difference Between Assisted Braking And Auto-locking Belay Devices?
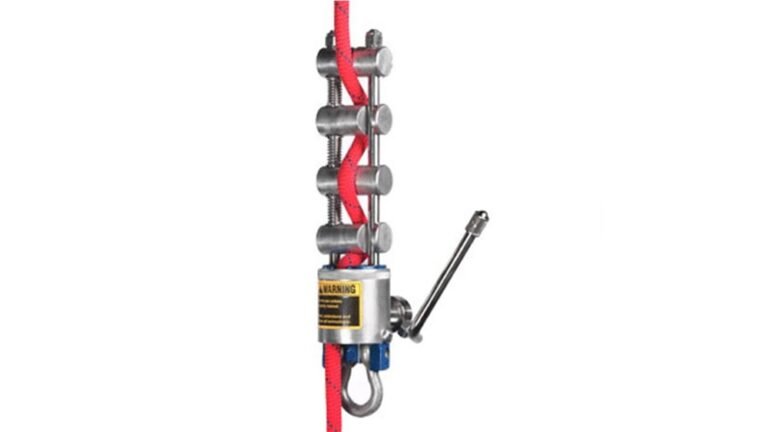
Assisted braking devices help stop the rope during a fall, but the belayer must always hold the brake strand. Auto-locking devices (rare in sport climbing) can lock the rope fully without the belayer’s help, but are mainly used in rescue or industrial settings, not for most climbing.
Are Assisted Braking Devices Safer Than Traditional Tube Devices?
Generally, yes. They add an extra layer of safety by helping stop the rope during a fall. However, they are not foolproof. Proper belaying technique is still required for safety.
Can I Use An Assisted Braking Device For Rappelling?
Some assisted braking devices, like the GriGri+ and Edelrid Mega Jul, can be used for rappelling. Others, like the Mammut Smart, are not designed for this purpose. Always check the manufacturer’s instructions.
Do Assisted Braking Devices Work With All Ropes?
No. Each device has a recommended rope diameter range. Using a rope that is too thin or too thick can make the device work poorly or not at all. Always check the specifications before use.
Where Can I Learn More About Assisted Braking Devices?
You can find detailed information and safety standards on the Wikipedia page for belay devices.
Belaying is a core part of climbing, and the right assisted braking device can make the sport safer and more enjoyable. With careful use, regular practice, and good safety habits, you can climb with confidence—knowing your belay device is there to help when it matters most.

2 Comments